Paper trading overview
Simulated trades placed during a bar replay — which panel decides the fills, how a fill is decided, what the simulation leaves out, and what is lost when you leave.
Paper trading lets you place simulated trades while a bar replay plays the market forward: you decide with everything after the replayed moment hidden, and the bars that follow decide whether your stop or your target was reached. No money and no exchange account are involved, and nothing is sent to a venue.
It exists only inside a bar replay, so it is available wherever replay is — on the desktop, at every access level, with no sign-in needed. Nothing about it is saved: the trades of a session last until you leave the replay.
The paper-trading panel
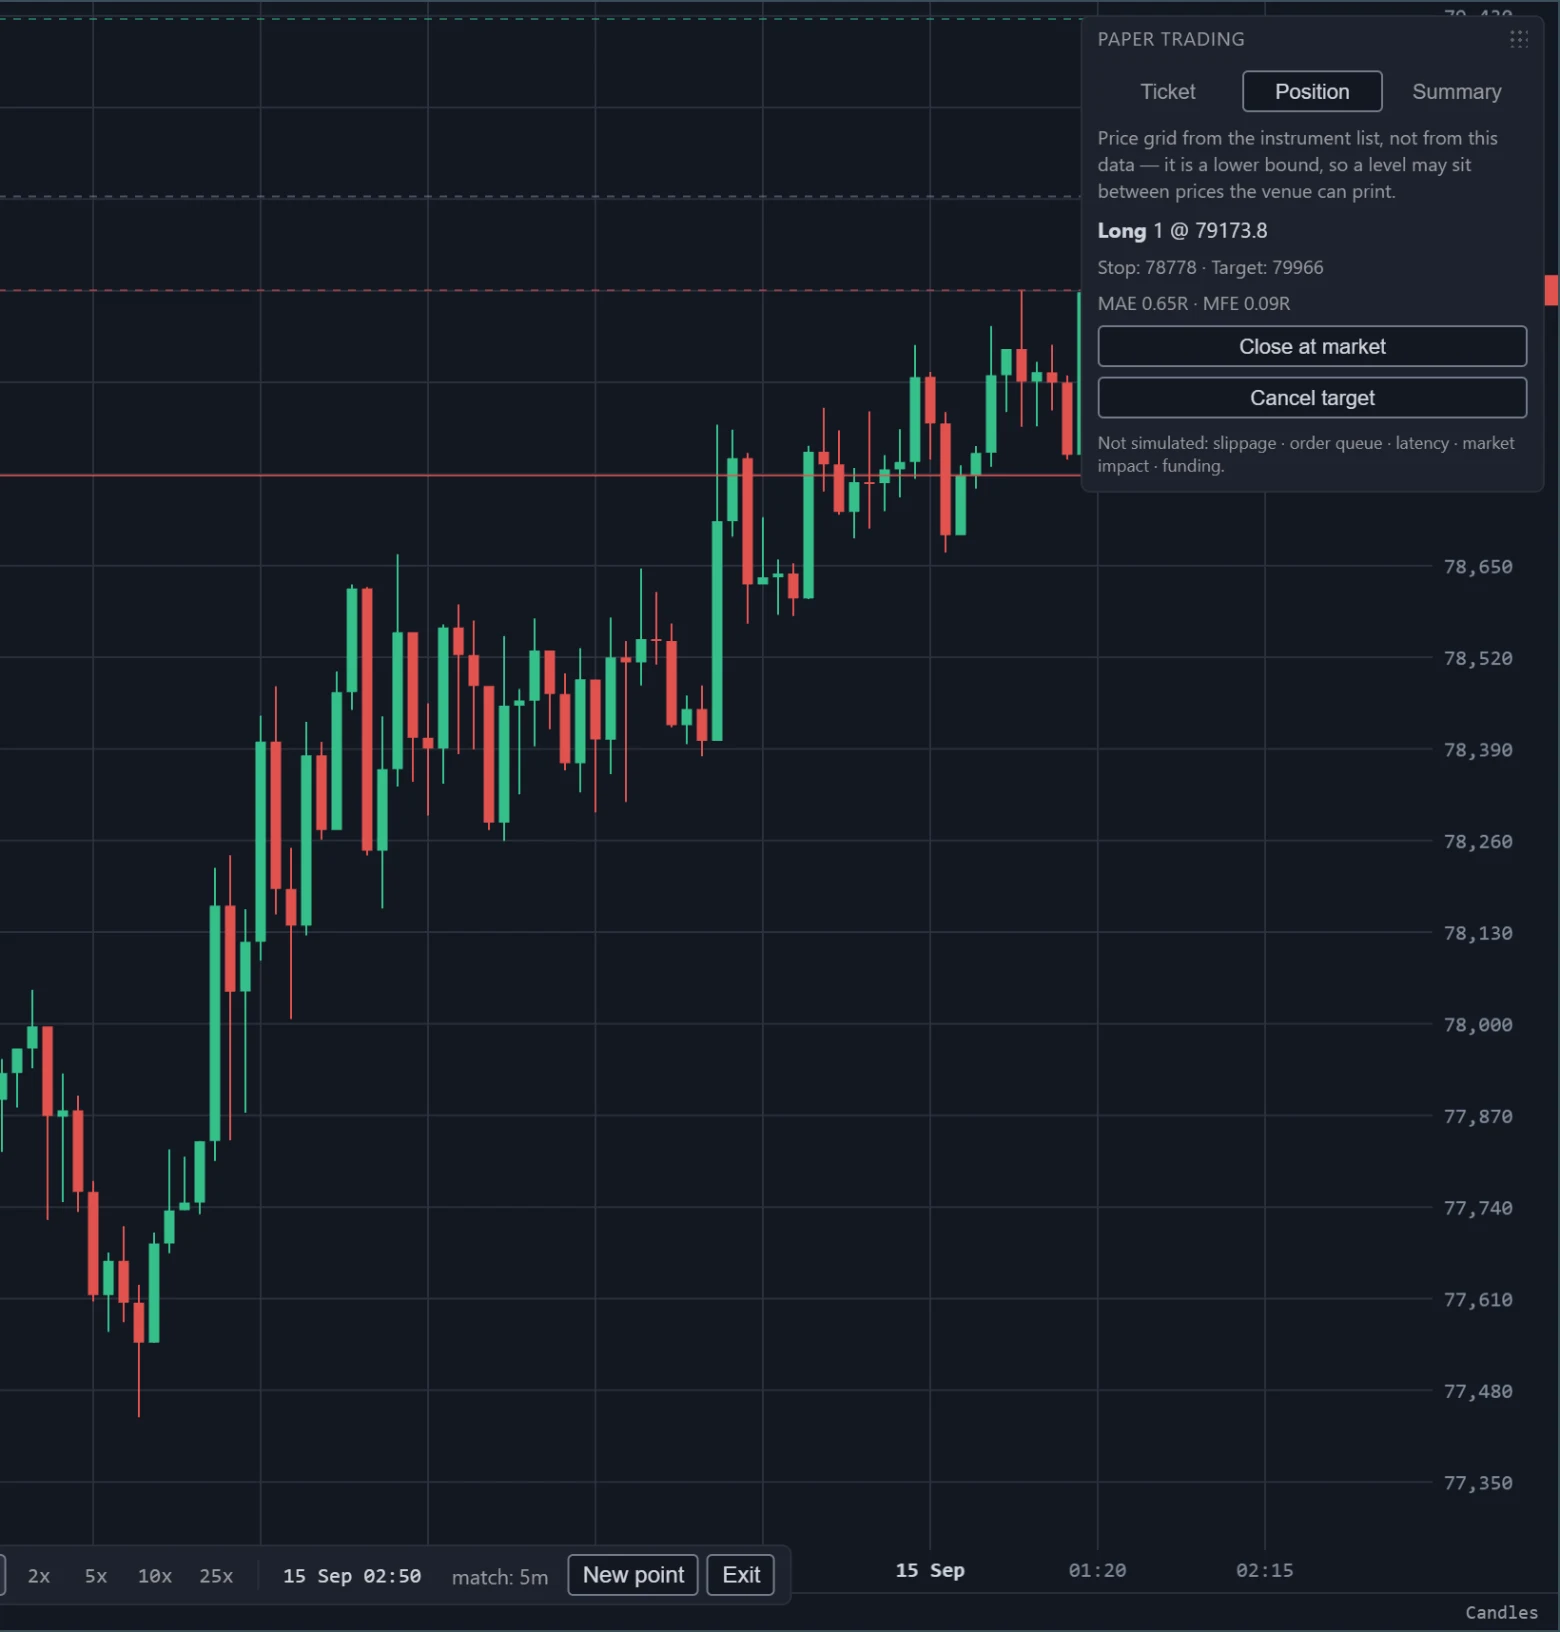
Start a bar replay and pick a mark; the Paper trading panel appears in the bottom-left corner of the chart. Drag it by its title strip to move it out of the way. It has three tabs:
- Ticket — place an order. See Placing trades.
- Position — the open position, with buttons to close it or drop its target.
- Summary — the session's numbers, its closed trades and the export. See Journal and stats.
Whichever tab is open, the panel also shows notes on why orders cannot be placed right now, and the line Not simulated: slippage · order queue · latency · market impact · funding. The panel closes with the replay.
If the browser window becomes narrow enough for the phone layout while a replay runs, the panel moves to the bottom of the chart, but the replay bar and every panel except the first are hidden — so there is no way to play, continue or leave the replay, and matching on any other panel stops. Widen the window again to get them back.
Which panel decides the fills
Fills are decided by the bars of one panel, the matching panel. When a match is needed, TapeHawk picks it from the panels showing the symbol of the active panel:
- every panel kind can match. A heatmap matches on the klines of its interval, loaded beside the book and not drawn on the field. Renko, range bars and line break match on the same klines the panel loaded — the fill is that candle, not the moment a brick closed;
- the panel has to have loaded bars to play after the mark, and to be showing at least one bar;
- the finest timeframe wins, because a smaller bar leaves less doubt about what happened inside it;
- between a candles panel and a footprint panel on the same timeframe, the candles panel wins. A footprint panel builds its bars from recorded trades, so a stretch with no trades has no bar.
A Heikin Ashi candles panel can match, and its fills use the real prices, not the averaged bars.
When the match is chosen
The rules above choose among the panels that have finished loading and show a bar. While no position is open, the choice is made again whenever it would come out differently: when a finer panel shows its first bar, when the matching panel stops matching, and when the active panel moves to another symbol. A panel stops matching every time it reloads — Continue reloads every panel, and turning an order-flow band such as CVD on or off reloads that panel — so a coarser panel can take over for a moment, and the finer one takes the match back once it has loaded.
With a position open, the match never changes. A reload of the matching panel pauses matching until that same panel has loaded again, and the note Matching paused: that panel is reloading. It resumes when its bars arrive; Close at market exits at its last price, marked stopped in the journal. shows meanwhile. When the position closes — at its stop, at its target or by hand — the choice is made again straight away: a finer panel takes over, and so does the active panel's symbol if you selected another one meanwhile.
The ticket names the symbol and venue the next order goes to, at the top of the Ticket tab.
The replay bar names the matching timeframe — match: 1h, for example. With a position open and a finer panel on that
symbol ready to match, it adds when that panel takes over: match: 1h — 1m takes over when this position closes.
A heatmap matches on the klines of its interval, loaded beside the book and not drawn on it. Renko, range bar and
line break match on those same klines — the fill is the candle, not the brick. Panels still loading or not yet
showing a bar are not counted.
When no panel can match
While no panel can match, the ticket is switched off and the panel says why:
| Note | When |
|---|---|
| No panel on this symbol can decide fills yet. | No panel on this symbol has bars the matcher can use yet |
| Waiting for the panel that decides fills to load — the ticket opens when its bars arrive. | One is open and still loading, or has not shown a bar yet — for a moment after you pick a mark, for example |
| The panel that could decide fills has no bars to play — its data could not load, or the replay reached its end. The ticket opens when it has bars again. | One is open, but its history failed to load, usually because of the rate limit, or it has no bars left to play. A failed panel loads it again by itself |
When the matching panel changes while a position is open, matching stops and the panel says why:
| Note | What happened | What to do |
|---|---|---|
| Matching stopped: the panel it was locked to is gone. Reopen it to continue. | The layout no longer shows the panel — a smaller layout was picked, or the window became narrow enough for the phone layout | Pick the layout again or widen the window |
| Matching paused: that panel is reloading. It resumes when its bars arrive; Close at market exits at its last price, marked stopped in the journal. | The panel is reloading — after Continue, or an order-flow band switched on or off | Nothing: it clears itself when the bars arrive |
| Matching stopped: that panel has no bars to play — its data could not load, or the replay reached its end. It resumes when the panel has bars again; Close at market exits at its last price, marked stopped in the journal. | The panel's history failed to load, usually because of the rate limit, or it loaded with no bars left to play | A panel whose history failed loads it again by itself, and matching resumes when it does. With no bars left, press Continue if the replay bar offers it. Either way, Close at market closes the position at the panel's last price |
| Matching stopped: that panel changed timeframe. Change it back to continue. | Its timeframe was changed | Change it back |
| Matching stopped: that panel changed symbol. | Its symbol was changed | Change it back |
| Matching stopped: that panel changed chart type or lattice — its bars are no longer the same series. | It was switched between candles and footprint. Other candle shapes, including Renko, range bars and line break, do not stop it | Change it back |
While matching is stopped:
- no bar is checked against the position;
- Close at market still works: it closes the position at the close of the last bar the matching panel revealed before it stopped, which is the newest price that panel has shown. Other panels may already be past that price, so the trade's row carries the badge stopped, and the summary counts these closes under Closed while stopped;
- dragging a level is refused with Matching is suspended — see the note above. Cancel target still works;
- the funding warning is hidden.
When matching resumes because you changed the setting back, or because the panel's history loaded on a retry, the bars that played in the meantime are checked straight away, so the position can close at once, at a time that has already passed. Resuming with Continue starts from where the replay is: the bars played while matching was stopped are never checked.
With no position open there is nothing to protect: the match moves to the next panel that can match, on its own.
How a fill is decided
A bar is checked once, when replay reveals it whole. TapeHawk sees only its open, high, low and close — not the order in which prices traded inside it — so each case below says how that doubt is settled. For a long position (a short is the mirror image, with the stop above and the target below):
| What the bar did | Fills | At | Badge |
|---|---|---|---|
| Opened below the stop | The stop | The bar's open | gap |
| Opened above the target | The target | The target price | gap |
| Reached the stop, and traded above the target | The stop | The stop price | ambiguous |
| Reached the stop | The stop | The stop price | exact |
| Traded above the target | The target | The target price | exact |
| None of these | Nothing — the position stays open |
- A stop fills on a touch: a low exactly at the stop is enough.
- A target needs price to trade through it: a high exactly at the target does not fill it, the way a resting limit order with others ahead of it in the queue would not.
- A gap past the stop costs the gap: when the bar opens beyond the stop, the stop was never on offer, so it fills at the open. A gap past the target fills at the target, not at the better open.
- An ambiguous bar goes against you. When one bar reaches both levels, it cannot say which came first, so the stop is taken. The badge says so, and the summary counts how often it happened.
A coarser matching panel puts more of these decisions inside a single bar. If the summary shows many ambiguous exits, use a finer panel. It also changes what an order sees: with finer panels on screen, the replay moves on inside the matching panel's bar, so the entry price is the close of the last bar the matching panel completed, and the first bar checked afterwards is the whole of the one that was already under way — including the part played before your order.
What the simulation leaves out
The panel names five things a paper fill does not account for:
- Slippage. A stop fills at its own price, even in a fast market where a real stop order would fill worse.
- Order queue. A real limit order waits behind the orders placed before it at that price. A paper target only approximates this, by asking price to trade through it.
- Latency. An order fills at the price the ticket shows, with no delay between your click and the exchange.
- Market impact. However large the quantity, it moves no price and always fills in full.
- Funding. Perpetual futures settle funding payments between longs and shorts at regular times; paper positions pay and receive none. On the Position tab, a position held over 8 hours of replayed time shows Held over 8 market hours — funding is not simulated.
Other limits of the model:
- orders are market orders only, and there is one position at a time;
- fees are fixed — see Fees;
- stops and targets are set on the symbol's price grid. When that grid comes from the instrument list rather than from the replayed data — the usual case on a candles panel without an order-flow band — the panel says Price grid from the instrument list, not from this data — it is a lower bound, so a level may sit between prices the venue can print.
What is kept, and for how long
Nothing is stored — not on your account and not in the browser. What survives depends on what you do:
| You | The open position | Closed trades |
|---|---|---|
| Press Continue at the end of the loaded bars | Kept | Kept |
| Pick a new mark with New point | Removed, with no fill and no row in the journal | Kept |
| Leave the replay (Exit, the toolbar button or Esc) | Removed | Removed |
| Open another page of the site from the chart — the TapeHawk logo, a link in the toolbar or account menu, or the language switch. Docs opens in a new tab and leaves the session alone | Removed, without asking | Removed, without asking |
| Close or reload the tab | Removed | Removed |
Before a new mark or leaving the replay removes anything, the panel asks at its foot. For a new mark with a position open it says A position is open. Moving the mark closes it without a fill. The journal is kept. When leaving with a position or closed trades, it says Leaving replay discards the open position AND the journal. Nothing is stored. Discard goes ahead; Cancel keeps the session. Closing or reloading the tab brings up the browser's own warning while there is a position or a journal to lose.
When the replay reaches the end of its loaded bars with a position open, the panel says Position still open — press Continue to carry on. In the phone layout, which has no replay bar, it says
Position still open at the end of the replay. Widen the window to continue, or close at market.
To keep a session, export it before you leave — see Export.