Value area and volume nodes
The value area band, high and low volume nodes, and the unfinished-auction mark on each footprint bar.
Three annotations sit on every footprint bar, each answering a question about where the bar's volume went. Switch them on and adjust them in Settings (⚙) with the footprint panel selected.
Value area
On by default. A soft band behind the rows where most of the bar's volume traded.
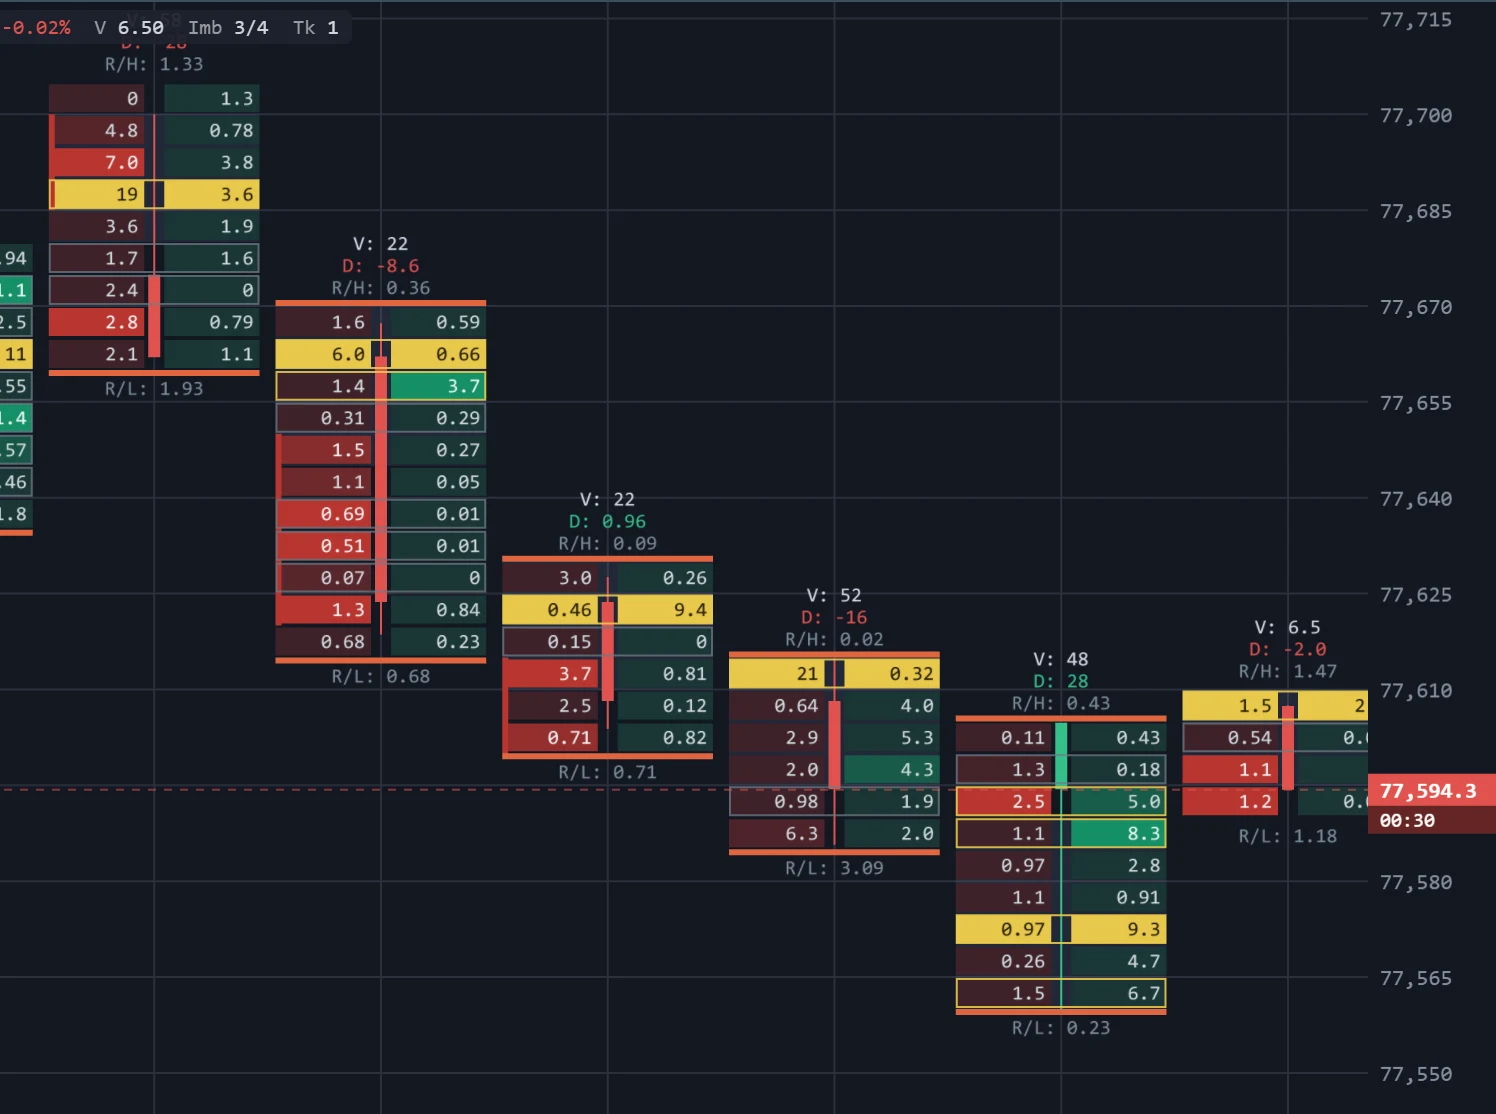
The band starts at the POC and grows one level at a time, each step taking whichever neighbouring level — the one just above or the one just below — traded more, until the band holds the share of the bar's volume set in Value area size (70% by default, from 30% to 95%). Because it grows outward from the POC, the value area is always one unbroken band, the same way Market Profile builds it.
Price that trades outside the value area is trading away from where the bar did most of its business.
Volume nodes
Off by default. Outlines the levels that traded much more or much less than the rest of the bar, measured against the bar's own POC — so the rule works the same on a coin that trades fractions and on one that trades millions.
- High volume node — a level whose volume reaches the High node from share of the POC's (70% by default). It gets a gold outline, like the POC itself: price spent real effort there.
- Low volume node — a level whose volume is at or under the Low node under share of the POC's (15% by default). It gets a grey outline: price moved through that level quickly. The top and bottom rows of a bar are never marked as low nodes, since almost every bar is thin where it turned.
Unfinished auction
On by default. Marks an end of a closed bar where the auction was not finished: a thin orange bar across the column's top or bottom edge.
A move usually ends with trading on one side only at its extreme — the last buyer at the high met no seller there. When both buying and selling traded at a bar's highest or lowest row, the move stopped while both sides were still active. Those levels are often revisited.
The mark appears only once a bar has closed, since the forming bar's extremes can still change.
All three are worked out from the rows the bar shows. With Hide dust rows raised, hidden rows are left out — so the value area can shift, and a thin extreme row that is hidden hands the "extreme" to the row next to it, which may then carry an unfinished-auction mark.